'Let me tell you a story' is about a little girl in her own little world, sharing short little stories about another little girl and the little things that she does during the day. Great read for bedtime.
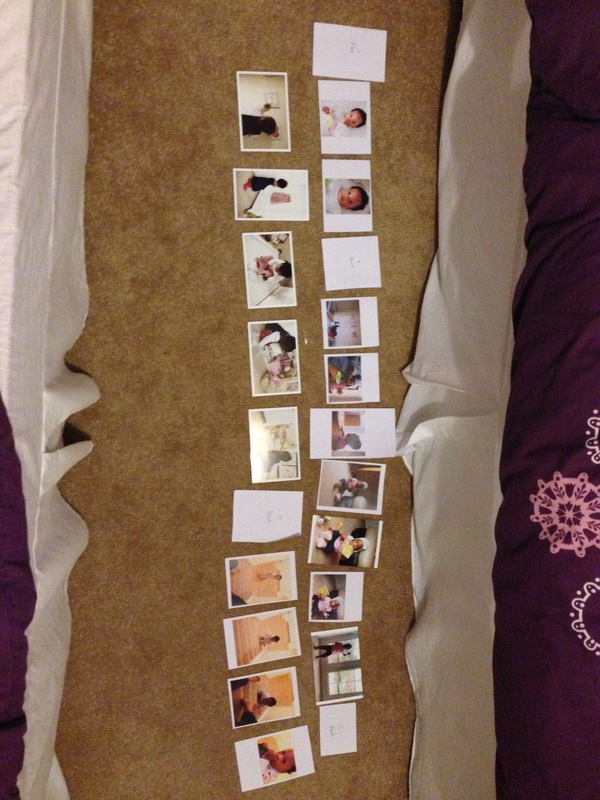
‘Let Me Tell You A Story’ is a simple to understand, bright and very colourful to read. This book is specially written for little girls who can relate around the age of 0-2years. The illustrations were created from real photographs, which were then converted to appear like cartoon. It is very important that the book is colourful and attractive, along with the rhyming words; it will continue to engage children of that particular age.
My youngest sister throughout the whole book played my character as the ‘little girl’. I decided not to use her name because I want other children that read it they can relate to her more or place herself in place of the little girl. It also creates a little mystery as to who that little girl might be, which creates simple problem solving which will stimulate their imagination.
How the story flows throughout the book. The layouts, colors, pictures, text connect throughout the book. As point departure, something minimal and non-interfering, which orients the spectator and then leaves the image to do its work. The bold colours chosen, accompanies the text as well as the image on each page, this acts as an icon. The font of the book I chose because it suggests ‘playfulness’ which what I wanted the book to portray. The last image for the book has the little girl’s back faced to us once the book is closed, to give a subtle suggestion that the story has now finished.
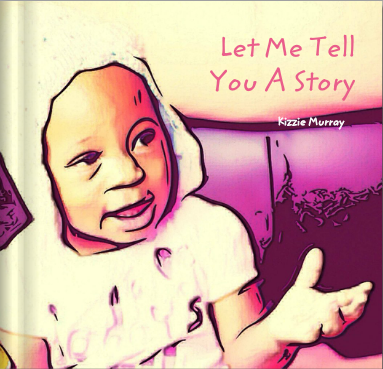
The picture used for the front cover, was used as it fit in perfectly with the title of the book, with the little girls hand leading us into the book. The book is good in a sense that it is well animated to suit the story. It shows how the scenes were well thought through. ‘Let me tell you a story is a story suitable for bedtime.
Each segment of the book and the text play a very important part in the story. “Let me tell you a story.” signifies the beginning of another chapter of the book. The font used is large, so are the pictures so the book can be easily read and followed in one sitting.
‘Let Me Tell You A Story’ is a simple to understand, bright and very colourful to read. This book is specially written for little girls who can relate around the age of 0-2years. The illustrations were created from real photographs, which were then converted to appear like cartoon. It is very important that the book is colourful and attractive, along with the rhyming words; it will continue to engage children of that particular age.
My youngest sister throughout the whole book played my character as the ‘little girl’. I decided not to use her name because I want other children that read it they can relate to her more or place herself in place of the little girl. It also creates a little mystery as to who that little girl might be, which creates simple problem solving which will stimulate their imagination.
How the story flows throughout the book. The layouts, colors, pictures, text connect throughout the book. As point departure, something minimal and non-interfering, which orients the spectator and then leaves the image to do its work. The bold colours chosen, accompanies the text as well as the image on each page, this acts as an icon. The font of the book I chose because it suggests ‘playfulness’ which what I wanted the book to portray. The last image for the book has the little girl’s back faced to us once the book is closed, to give a subtle suggestion that the story has now finished.
The picture used for the front cover, was used as it fit in perfectly with the title of the book, with the little girls hand leading us into the book. The book is good in a sense that it is well animated to suit the story. It shows how the scenes were well thought through. ‘Let me tell you a story is a story suitable for bedtime.
Each segment of the book and the text play a very important part in the story. “Let me tell you a story.” signifies the beginning of another chapter of the book. The font used is large, so are the pictures so the book can be easily read and followed in one sitting.

 RSS Feed